Step 1
Login to your Glow account.
Step 2
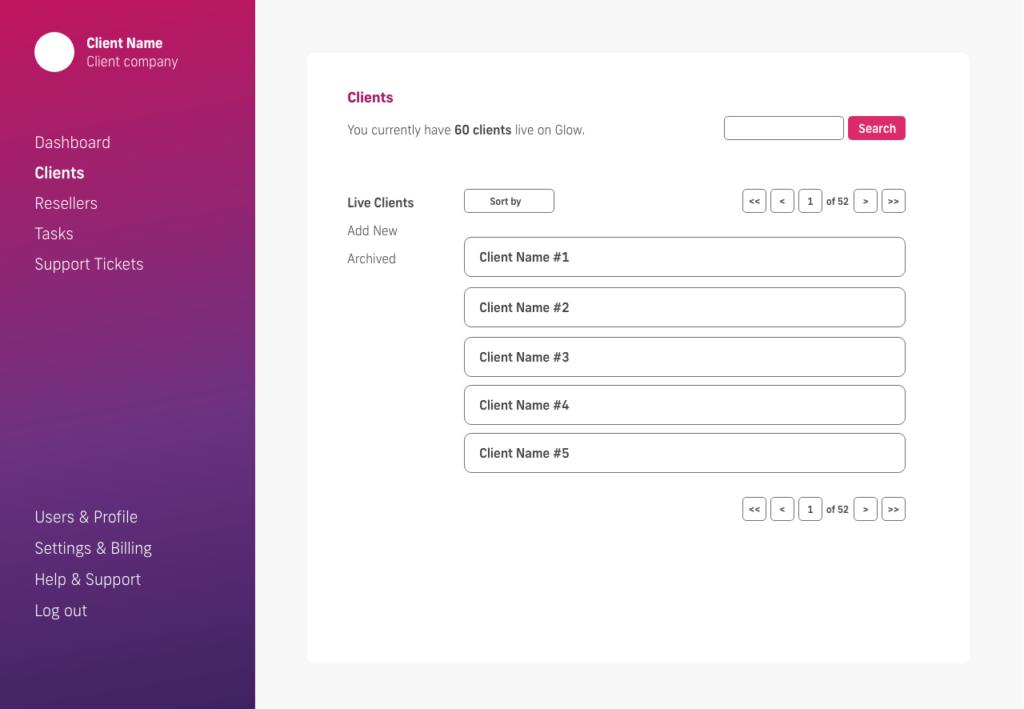
Once logged in, click on Clients from the main left hand menu.
Step 3
The Clients screen will load the Live clients tab from the inner menu automatically. Click on the name of the client for whom you want to record custom work.
Step 4
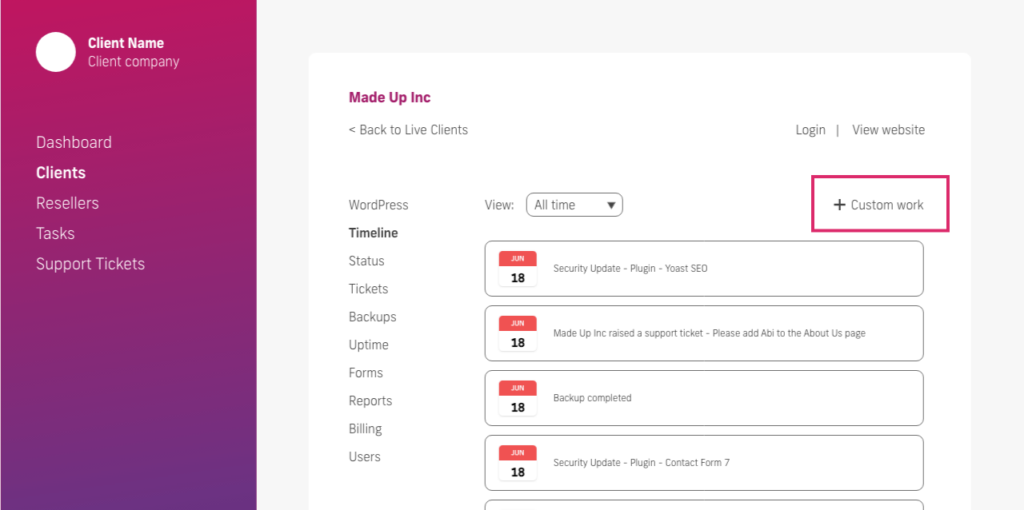
You will now be shown the client area. The client’s name that you clicked in Step 3 above will be shown as the main heading at the top and the inner menu will load on the WordPress tab by default.
Step 5
Click on the Timeline tab from the inner menu.
Step 6
Here you will see all Timeline entries and in the top right corner, a link that says Custom work, with a little ‘plus’ icon to the left of it.
Click this link.
Step 7
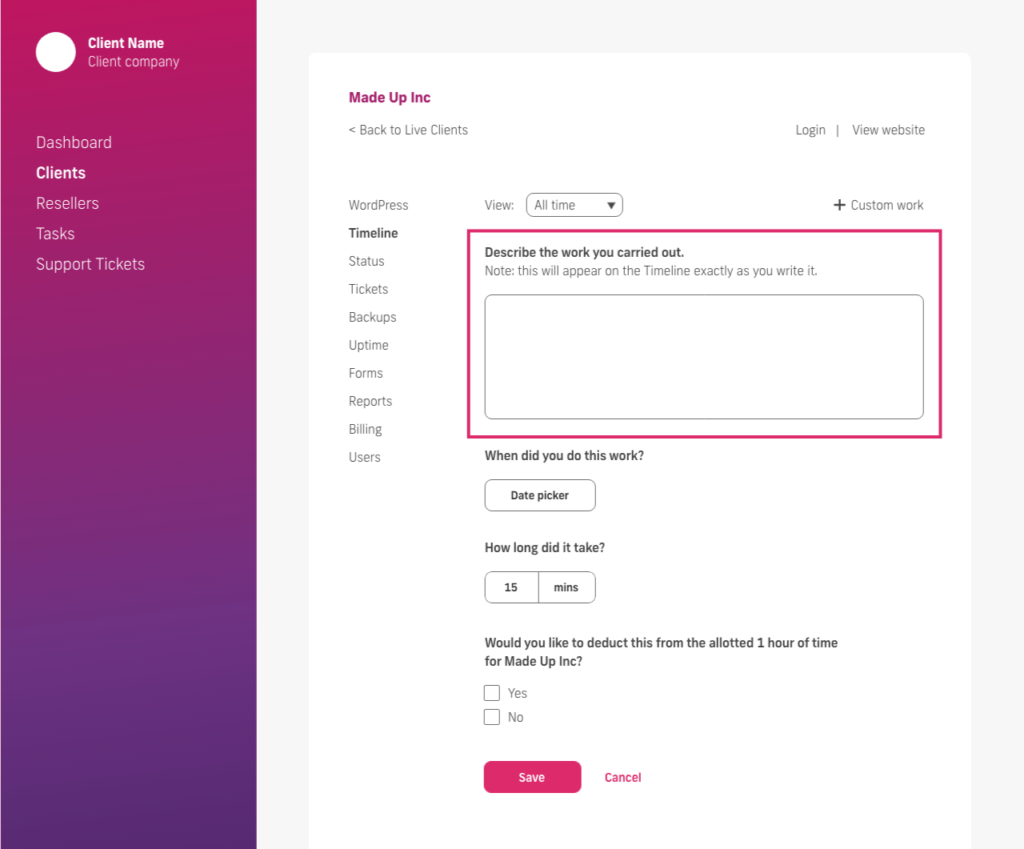
On the next screen you will see a number of options.
Begin by describing the work carried out, in the text box at the top of the screen.
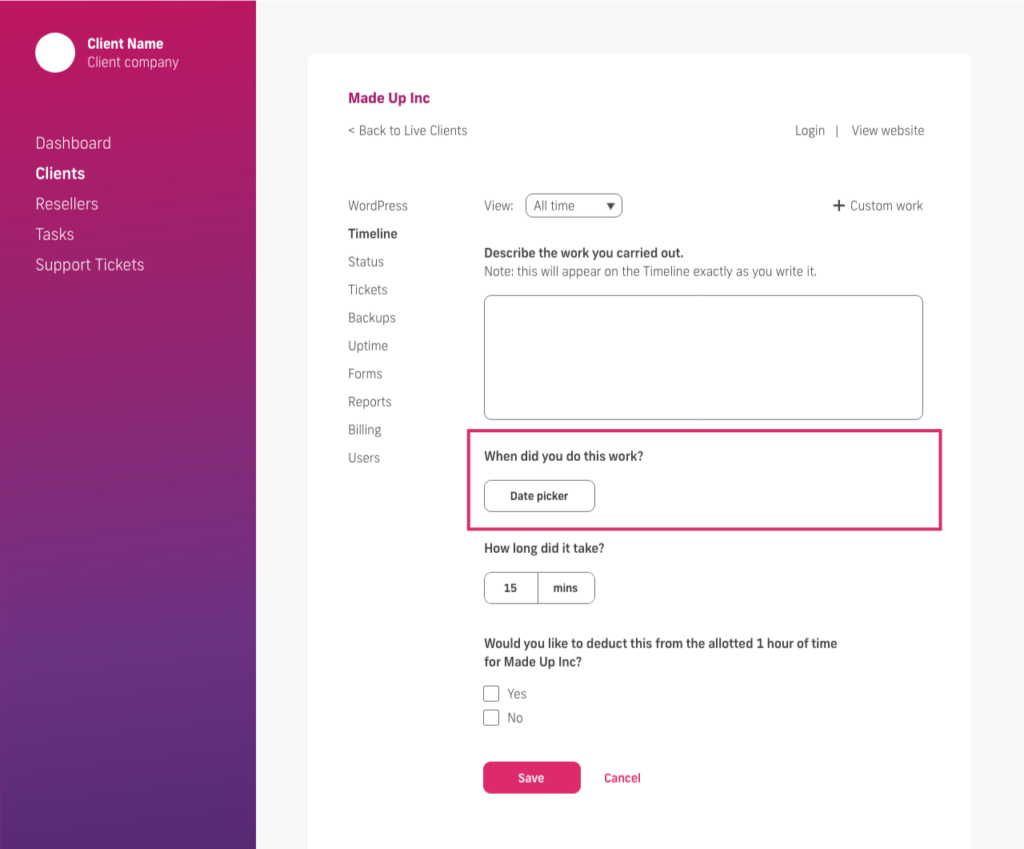
Step 8
Next, use the date picker in the When did you do this work? section, to set when this work was completed. This is the date that will show in the client’s Timeline and on your Activity Log.
Step 9
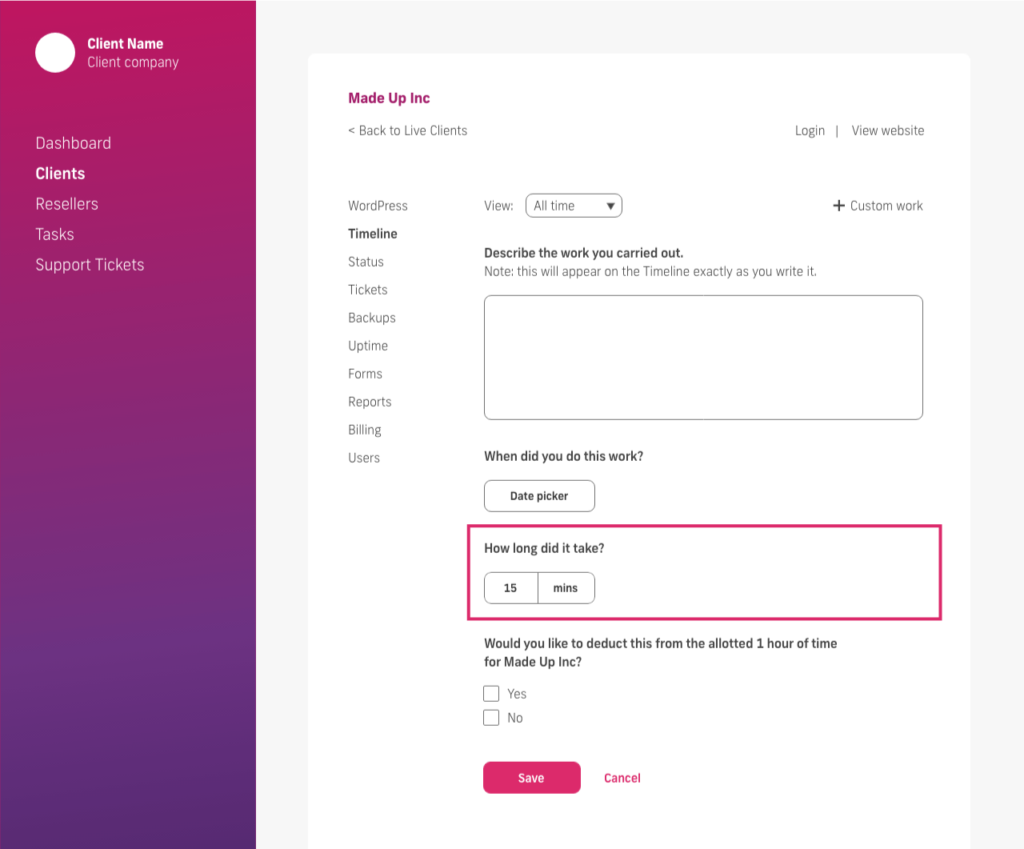
Now you need to set how long the work took. To do this, use the dropdown fields in the How long did it take? Section.
Step 10
Finally, you will see a question at the bottom of the screen, asking you if you’d like the time this work took you to complete, to be deducted from the client’s allotted amount of monthly custom development time.
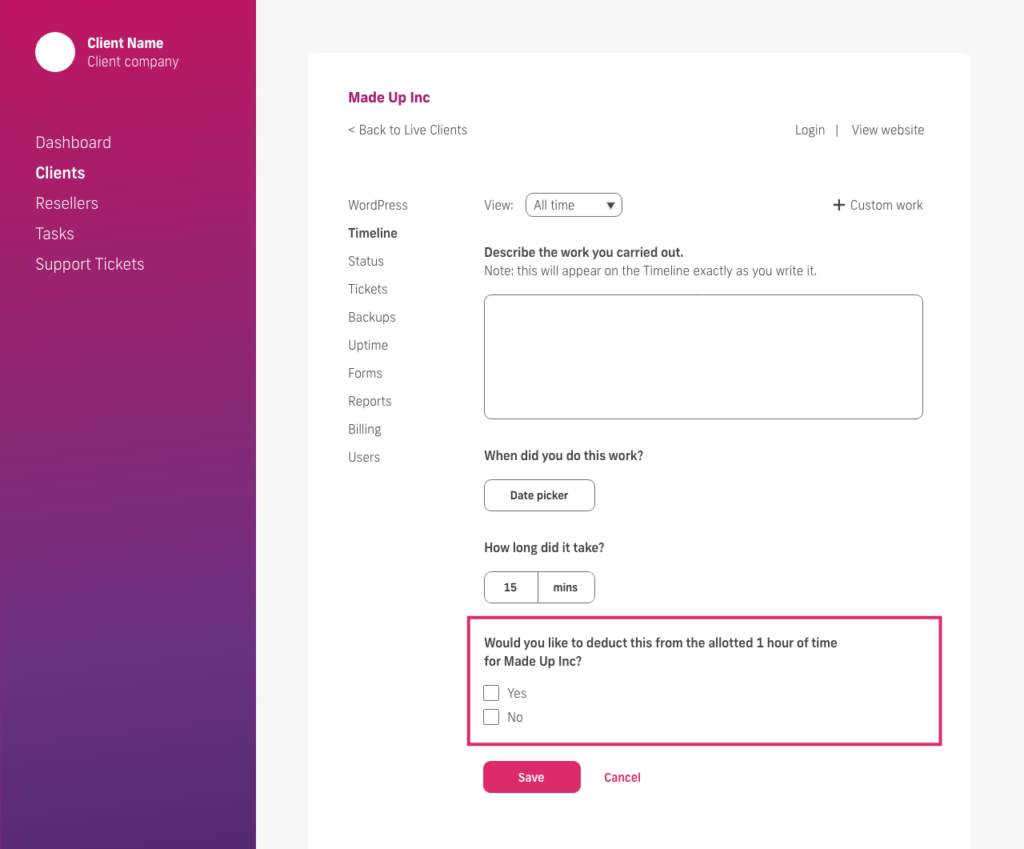
If you would, select Yes.
If you would not, select No.
Step 11
Click the Save button at the bottom of the screen.
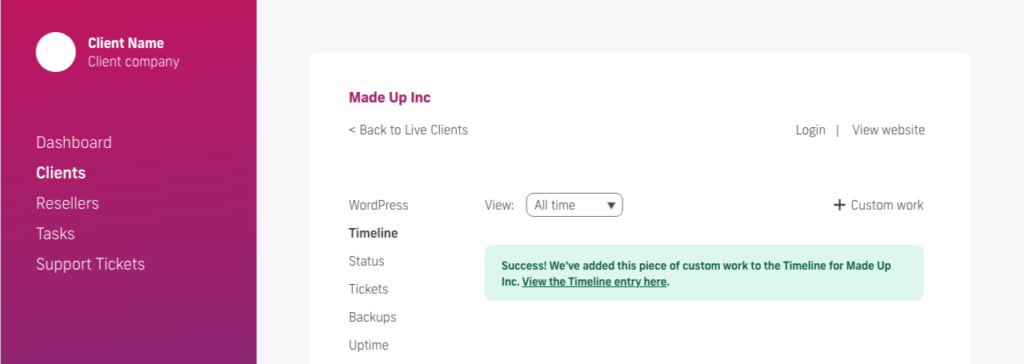
Step 12
You will now see a success message on screen, informing you that this piece of custom work has now been added to the client’s Timeline.
You can click the link in the success message to view the Timeline entry too.